Showing posts with label tutorial. Show all posts

Saturday, 26 April 2014

Elf Long Lasting Lustorous Eye shadow Collection (with swatches!) ♥


Hello! I was recently contacted by Elf and asked to review their Long Lasting Eyeshadow collection, I was super excited to try out these shadows, they're so pretty!
This collection has such a gorgeous colour range, each shade is wearable and there are no over the top, bright colours which I am really pleased about. They are cream based eyeshadows, each shade is highly pigmented and very shimmery. 
I applied these eyeshadows first thing in the morning with a flat eyeshadow brush and by the end of the day they were still as bright and fresh as they were when first applied, they don't crease or transfer onto my face either which is great. I have been using them on their own and also blended together with a flick of eyeliner to finish off the look. 
To recreate the makeup look above I used 'Toast' on the inner corner of my lid, with 'Soiree' blended into it in the middle of my eye. I then applied 'Gala' onto the outer corner of my eye and blended it into my crease, I used 'Festivity under my lower lash line to make my eyes stand out a bit more, finally I applied 'Confetti' onto my brow bone as a highlight, which worked really nicely! I then finished off the look with Elf's liquid eyeliner (review here). 
I hope you enjoyed this post, let me know what you think of these eyeshadows! 
SHARE:

Wednesday, 5 February 2014

My Gel/UV Polish Collection & CCO Review & tutorial ♥


Hellooo! I really feel like I'm getting my blogging mojo back, which is so good because over the past couple of months I have been falling behind, especially after blogging so often to never at all! I guess everyone has those kinds of months at some point but now I am in my new room I feel like I need to blog more to show off how pretty it is! I hope you are enjoying my new picture backgrounds, I am still experimenting so bear with me! Anyway I hope you enjoy today's post!

When I worked in my cousins hair and beauty salon last year I was always getting my nails done with Shellac Gel nail polish, it was such a treat for my ever breaking and peeling nails. When I left the salon  to work elsewhere I missed getting my nails done all the time. I am sure I would still get them done for free but I don't want to ask and I don't want to pay £10/15 a time to get them done elsewhere, so I thought I would invest in a UV lamp from Banggood and some decent gel polishes that don't cost a bomb like the Shellac ones do. I was so happy when I came across these ones on eBay. I have purchased from this seller on 3 different occasions and I have never had any problems. My items arrive quickly and safely each time. The polish lasts on my nails for about 8/9 days which is so good for me because it gives my natural nail time to grow and strengthen. My nails don't grow very long unless they have these polishes on them!
TUTORIAL:
First I apply a uv base coat onto my natural nail (featured on the far left of the picture above) and cure under the uv lamp for about 10 seconds. I then apply a thin layer of my chosen uv colour without touching the sides of my nails/skin, as this will cause the polish to peel at the edges and come off later on, I then cure the coloured polish for 2 minutes, I repeat this step two more times to get a thick and bold colour. When I am happy with my nails I apply my top coat (featured on the far right of the picture) and cure for a further 2 minutes. When I am finished I take a small amount of nail polish remover on a cotton pad to remove the sticky residue from each of my nails. It is important you don't remove the sticky layer until the end, after you have applied your top coat as your uv polish will not set properly and will not work. A lot of people recommend you only use 99% Isopropal alcohol but I find that Acetone/nail polish remover works just as good, it leaves my nails shiny and strong!
Do you have any gel nail polishes? (: 
SHARE:

Thursday, 31 October 2013

Halloween | Easy Slime Nail Art Tutorial


Happy Halloween! I hope you enjoy my second Halloween inspired nail art tutorial!
1. You will need: Red polish (Calvin Klein 'Salmon'), dark red or dark pink polish (Barry M Hi-Shine '305 Pomegranate'), top coat(MUA) & a dotting tool.
2. Draw a wavy line at the tip of your nail using a dotting tool.
3. Paint a darker shade at the top of your nail and blend in with a dotting tool or small detail brush. Dot red polish onto the middle of your nail to create a drip effect. Finally apply a glossy top coat to finish off your design.

xo

SHARE:

Thursday, 14 February 2013

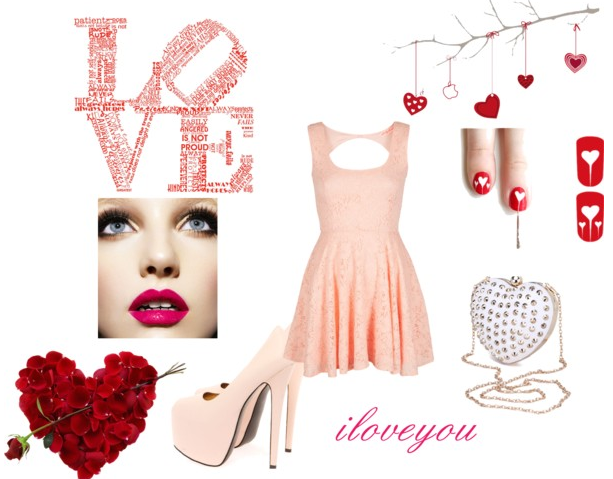
This Weeks Polyvore Collage - Valentines Edition ♥

Happy Valentines Day everyone! I decided to theme this weeks polyvore with Valentine's day. 
This outfit would look lovely if you are going out for dinner or lunch! I hope you like it, I love the nail tutorial!
p.s. You can use my Valentine's template for your own collage from my Polyvore page, Click Here.


SHARE:
Blogger Template by pipdig